To export only a small portion of the plot, you can crop the image, change the map limits, or export the current view.
Method 1: Crop the image.
- Select the Base(raster) layer in the Contents window.
- In the ribbon, click Features | Image | Crop.
- Drag the yellow handle bars to frame the area of the image you'd like to keep. Press ENTER when finished.
- Remove the excess white space where the image used to be by:
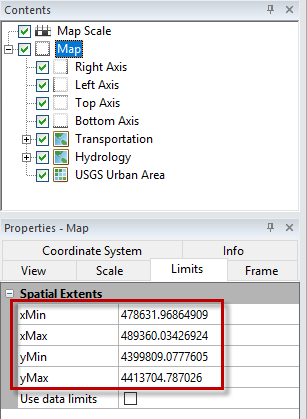
- Click the Map object in the Contents window.
- In the Properties window, click the Limits tab.
- Click Use data limits.
Method 2: Changing the map limits
You could change the map limits to only show the area you want, and then export. To do this:
- Select Map in the Contents window.
- In the Properties window, click the Limits tab, and specify the x and y minimum and maximum coordinates of the area of interest.
- Click the Scale tab and specify the size of the map you want.
- Click File | Export to export the subset area of your map.
Method 3: Export current view only.
Zoom into the area you want, then choose to export only that view. To do this:
- Zoom in so the plot window shows just what you want to export.
- Click File | Export.
- At the bottom of the Export dialog, check the box next to Current view only.

- Give your file a name and a type then click Save.
- Set the desired export options and click OK to create the export file.
Updated September 17, 2020
Comments
Please sign in to leave a comment.